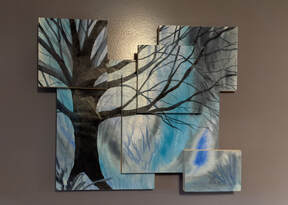
 Once I learned I could safely display watercolor unframed, I wanted to revisit the 'fragmented' idea. I had a full sheet watercolor painting that was part of the Imagined Woods Series. I decided to give it a try. This time the painting would be on wooden panels rather than in rickety frames, I could use wood glue and screws, rather than fairy dust and good intentions (first version).
I loved it, and I learned so much. In the future, I needed to think about how the piece would balance. If I want it to be displayed at a gallery, it must hang straight from just one hook. This one worked out, but I realized that it could have been an issue. This piece debuted at Ruckus Coffee Gallery, in Shaler. They were newly opened, and I was honored to be their very first artist to display in their cafe gallery. The piece did not sell while on display, but a man got in touch with me hoping I still had it so it could Christmas gift for his wife. They had seen it at the cafe, and she really liked it. Success! People liked the fragmented painting. The next question on my mind was - what would it look like to plan a painting with the intention of fragmenting it?
0 Comments
 I am a teaching artist and often students will ask, “Can I do this?” Sometimes the answer is, yes, but the answer is rarely no. More often it is an admission that I have not tried that. Sometimes it is, “It did not work for me, but it might work for you.” Who knows what is possible? I tell students all the time that no one ever invented something new by waiting for someone else to tell them how to do it.
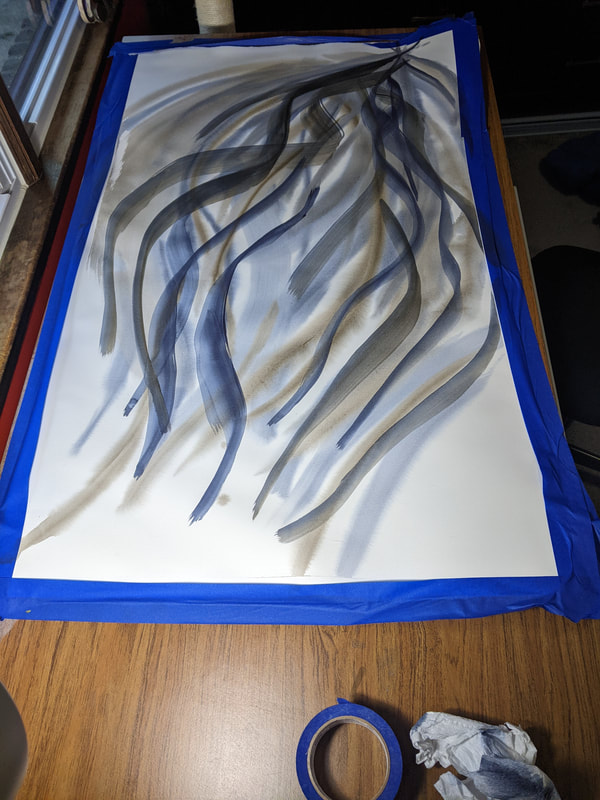
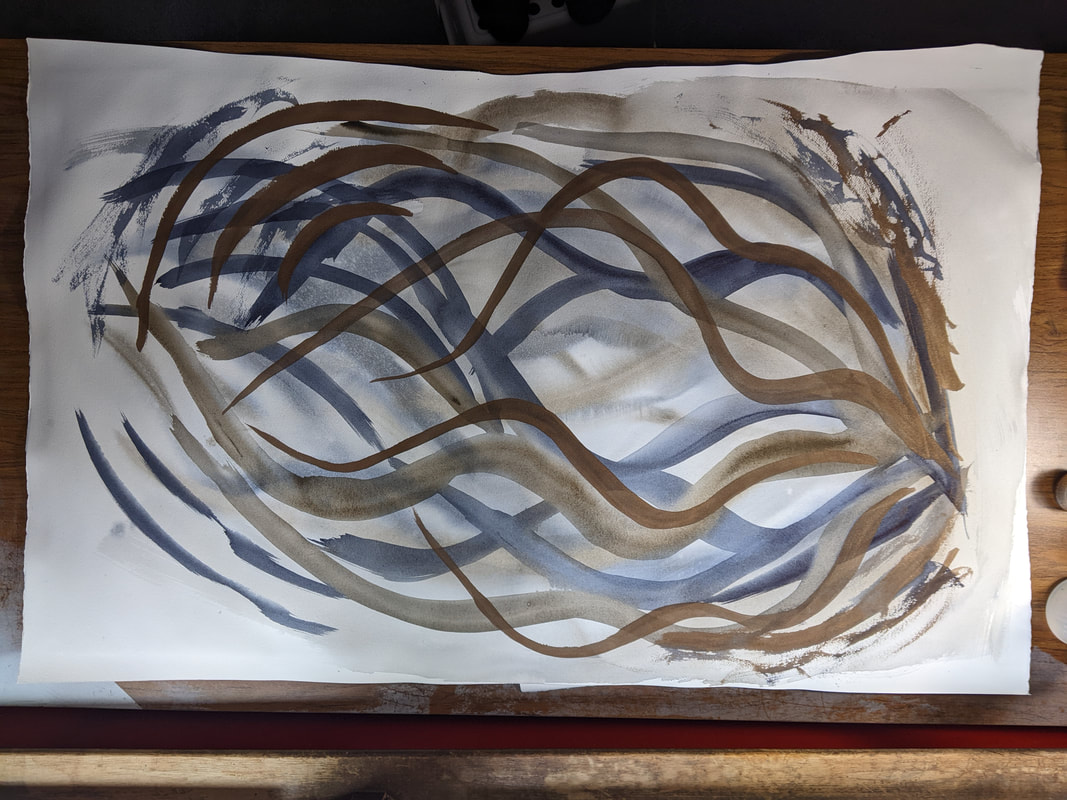
Art does not always offer definitive answers. This isn't chemistry, nothing is going to explode. Given that freedom – try it! Applying this spirit to my own work: Years ago, I had the idea to create fragmented or fractured works. I had seen this done with mass produced pieces, but never with watercolor. This was also when I thought the only thing to do with watercolor was to frame it. If you are new to my blog, take a look at my original post - “Why I hated the medium I Love”, posted on 1/25/22 and subsequent posts to learn about my process. Here is my very first effort for this project. Circa 2015! I don't mind how it looks. You can see early hints of the Imagined Woods Series. However, I used Ikea frames and my own ingenuity to put them together; consequently, it quickly fell apart! Lol. Fear not, more sophisticated (and sturdier) versions were on the horizon, I just didn't know it yet. 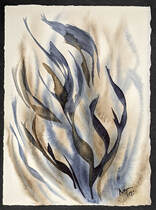 Ruffled Feathers ll, the small work I would like to duplicate. Ruffled Feathers ll, the small work I would like to duplicate. I look at a 7.5” X 5.5” painting that was pure magic. I was playing (one of watercolor's most valuable learning tools) with 2 new pigments. I would love to do this again – but big, really really big. Like, as big as the table big. What could go wrong??? Nearly everything. But we can give a go, right? First let's trouble shoot.
The second try was better. However, the original was light and airy, the second try was too contained. The edges all curled in on each other. The bright spot, literally, was the addition of a Pearl EX pigment to the sepia. I loved the sparkle and that lead to other experiments and more play. You'll see where this lead in a future post. 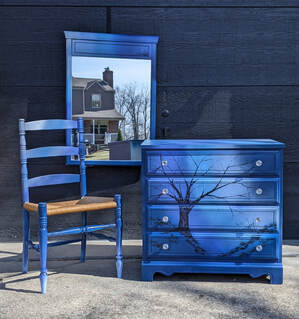 aI am excited to be part of Second Harvest's Thriftaversary! One year ago, they opened their doors to become a clean, beautiful and high-quality thrift store. I love to shop for second-hand for many reasons, but I am actually pretty picky about where I spend my precious time. I love shopping at Second Harvest. I believe in their mission, I find lots of great stuff there and it is neat and organized. So here is the collaboration. They delivered some less than glamorous furniture pieces. I got to refinish them any way I wanted. My partner in this adventure was, local art hero, Nanci Goldberg, FCASD art teacher and owner of Ketchup City Creative. The refinished furniture (pictured), will be part of the silent auction at Second Harvest. The auction will be open from March 14 through March 19th. Money raised by the auction will benefit Ketchup City Creative. The dresser was inspired by my Imagined Woods Series. I began painting the series during quarantine at the beginning of the pandemic. Things were stressful and everyone was home. I wanted to paint, but I just could not sit, concentrate and plan a painting the way I preferred. It was painted now or loose the opportunity. This urgency forced me to work quickly, so I fell back on a favorite theme – forests and trees. I started with an atmospheric background by dropping color into the sky. I dragged my brush through the paint while it was still wet, to suggest distant trees. After it dried, I added a second layer using a watered down version of the color I would use for the tree trunks in the foreground. Finally, I painted the foreground when the previous layer dried. I experimented with colors, shapes and sizes. I played with the season and weather conditions. I let my creativity take the reigns, and I love the results. Some of the paintings are dark and foreboding, others are light and hopefully. All of them hint at a distant light – the hope for the future. I'll have some of my paintings from the series hanging in the store during the week of celebration. You can see the full Imagined Woods Series here. 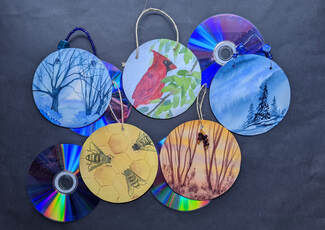 My paintings mounted on reclaimed CDs. My paintings mounted on reclaimed CDs. Back to the drawing board.... The drawing board again was Pittsburgh Center for Creative Reuse. The bulk section is a wealth of materials and, as the name suggests, there is often a lot of it. This trip I paused in front of the CD bin. Could I affix round paintings to a CD? How would I hang it? I loaded up a bag, on the way home, my mind was churning out ideas. Designs, connecting them to make bigger designs, I was excited to get started. Paint, cut, affix, drill, varnish, hang... It worked and they were a big hit during the holidays! Here is the direct link to my current inventory in my Gallery/Shop. Months later I was looking for something that would fit a more traditional rectangular shape. This time I noticed some plastic corrugated lawn signs. Sadly, these were not in the bunk section. But I grabbed a few, so I would have enough for experimenting. This worked too. How exciting! There was a wealth of signs, especially post-election. So many of them are specific to the person, office and year. They do not have a future use for the candidates. My first round of signs came from history making group - Sharpsburg for All. Click here to see all the Eco-friendly and ready to hang paintings in my Gallery/Shop. 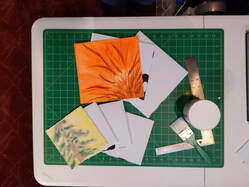 Materials I use to mount my paintings to the corrugated plastic (election) sign. |
AuthorMelissa Tai is a lifelong creative, nature lover & tree hugger. 
Photo credit:
Nanci Goldberg
Archives
August 2022
Categories |


 RSS Feed
